
Four ways to run, one engine underneath
From the canvas, from the workflow, from the terminal inside Studio, or from your own shell. The button changes; what executes does not.
1. Objective
Goal
Bring an existing job into a project, finish it, then run it four different ways. By the end you should know which one to reach for, and be able to read the numbers each returns.
Keep one cumulative Studio project named studio-course, one manual workflow named first-workflow, and one job named first-job. Each lesson builds on the state saved by the previous one.
Prerequisites
- Hydra API started with
hdrctl serve. - Studio started from
Hydra/studiowithnpm run dev. - A CSV file to read, and a folder to write into.
2. Steps
01Import a job you already have
Objective
Reuse a job written elsewhere instead of rebuilding it.
Actions
- Open Workflow configuration.
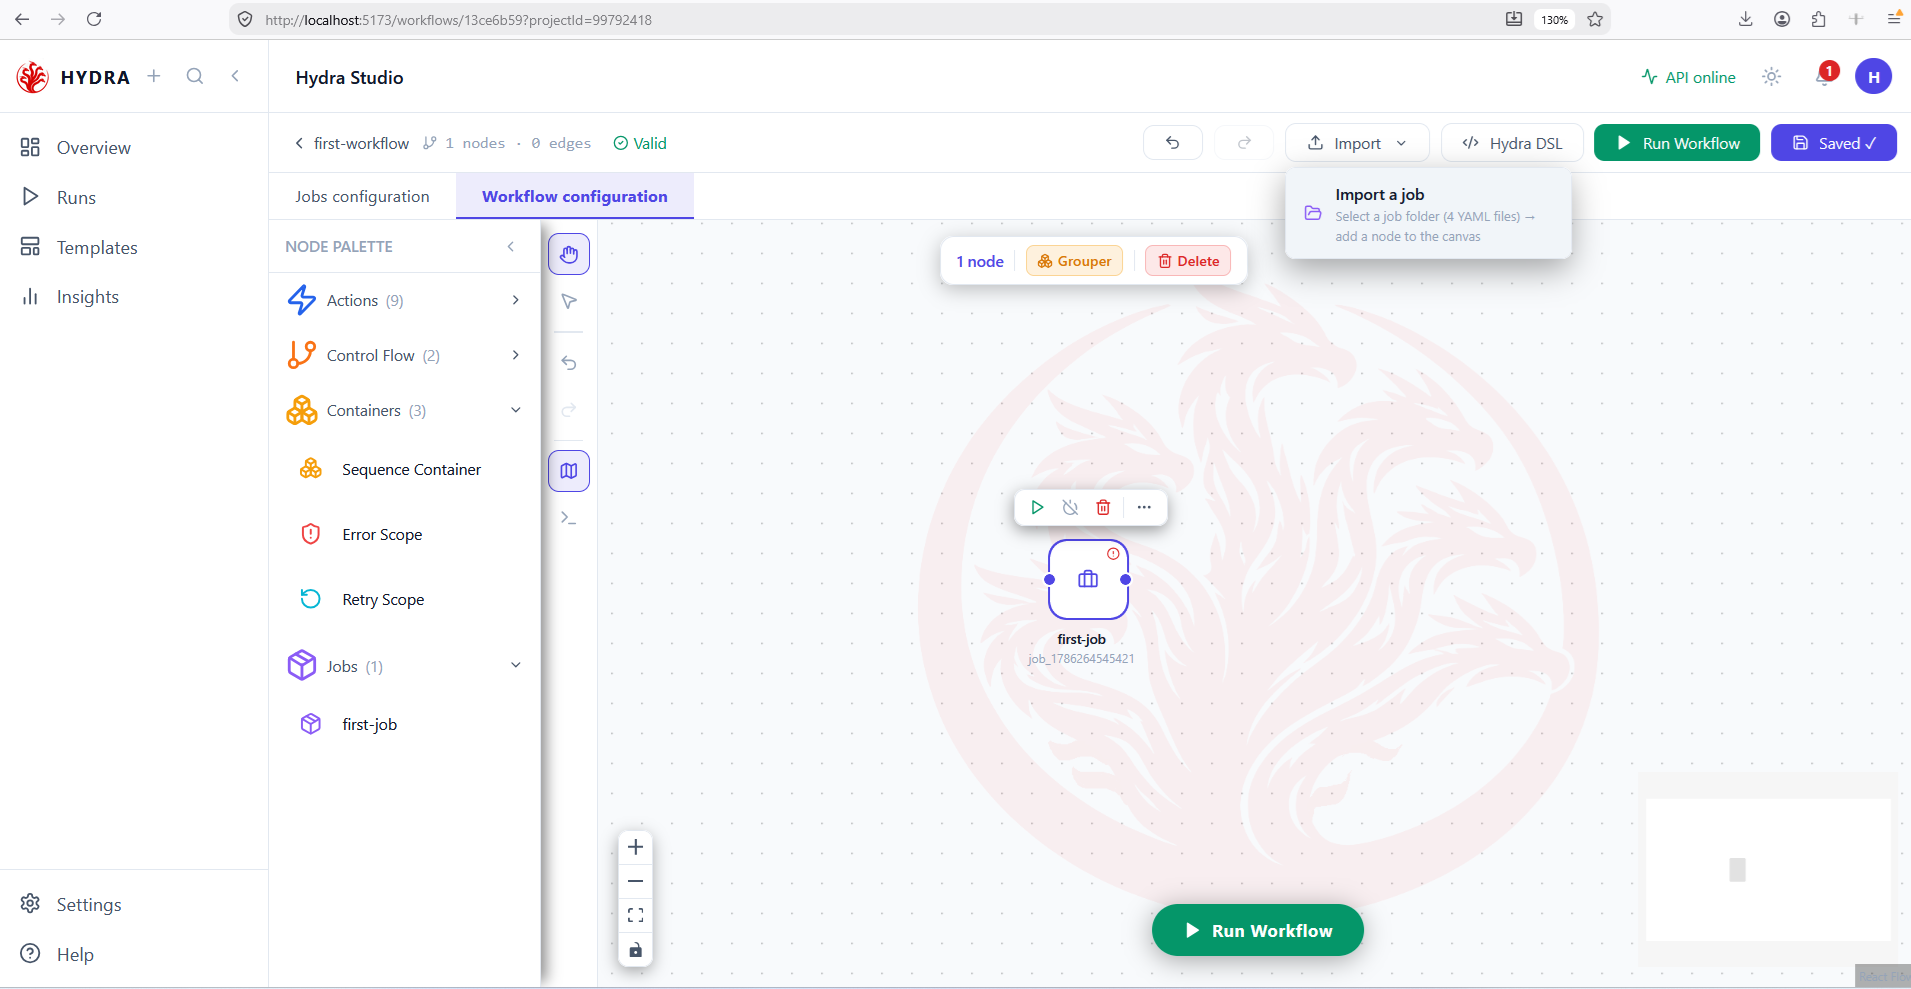
- Select Import in the top bar, then Import a job.
- Pick a folder holding the four job manifests.
Workflow configuration → Import → Import a job
This is a third route into a project, and the most direct. Open a project takes a whole workspace, Import workflow takes a workflow and its jobs — Import a job takes one job folder and drops it straight onto the canvas as a node.
A job node appears on the canvas and the job joins the Jobs category of the palette. It carries a red badge until you confirm its paths.
Import a job
Select a job folder (4 YAML files) → add a node to the canvas
02Finish the job before running it
Objective
Give the imported job the transformation it is missing.
Actions
- Double-click the job node to enter Jobs configuration.
- Drag a Filter between the source and the destination.
- Reconnect the chain so the three nodes follow one another.
Transformations → Filter → connect
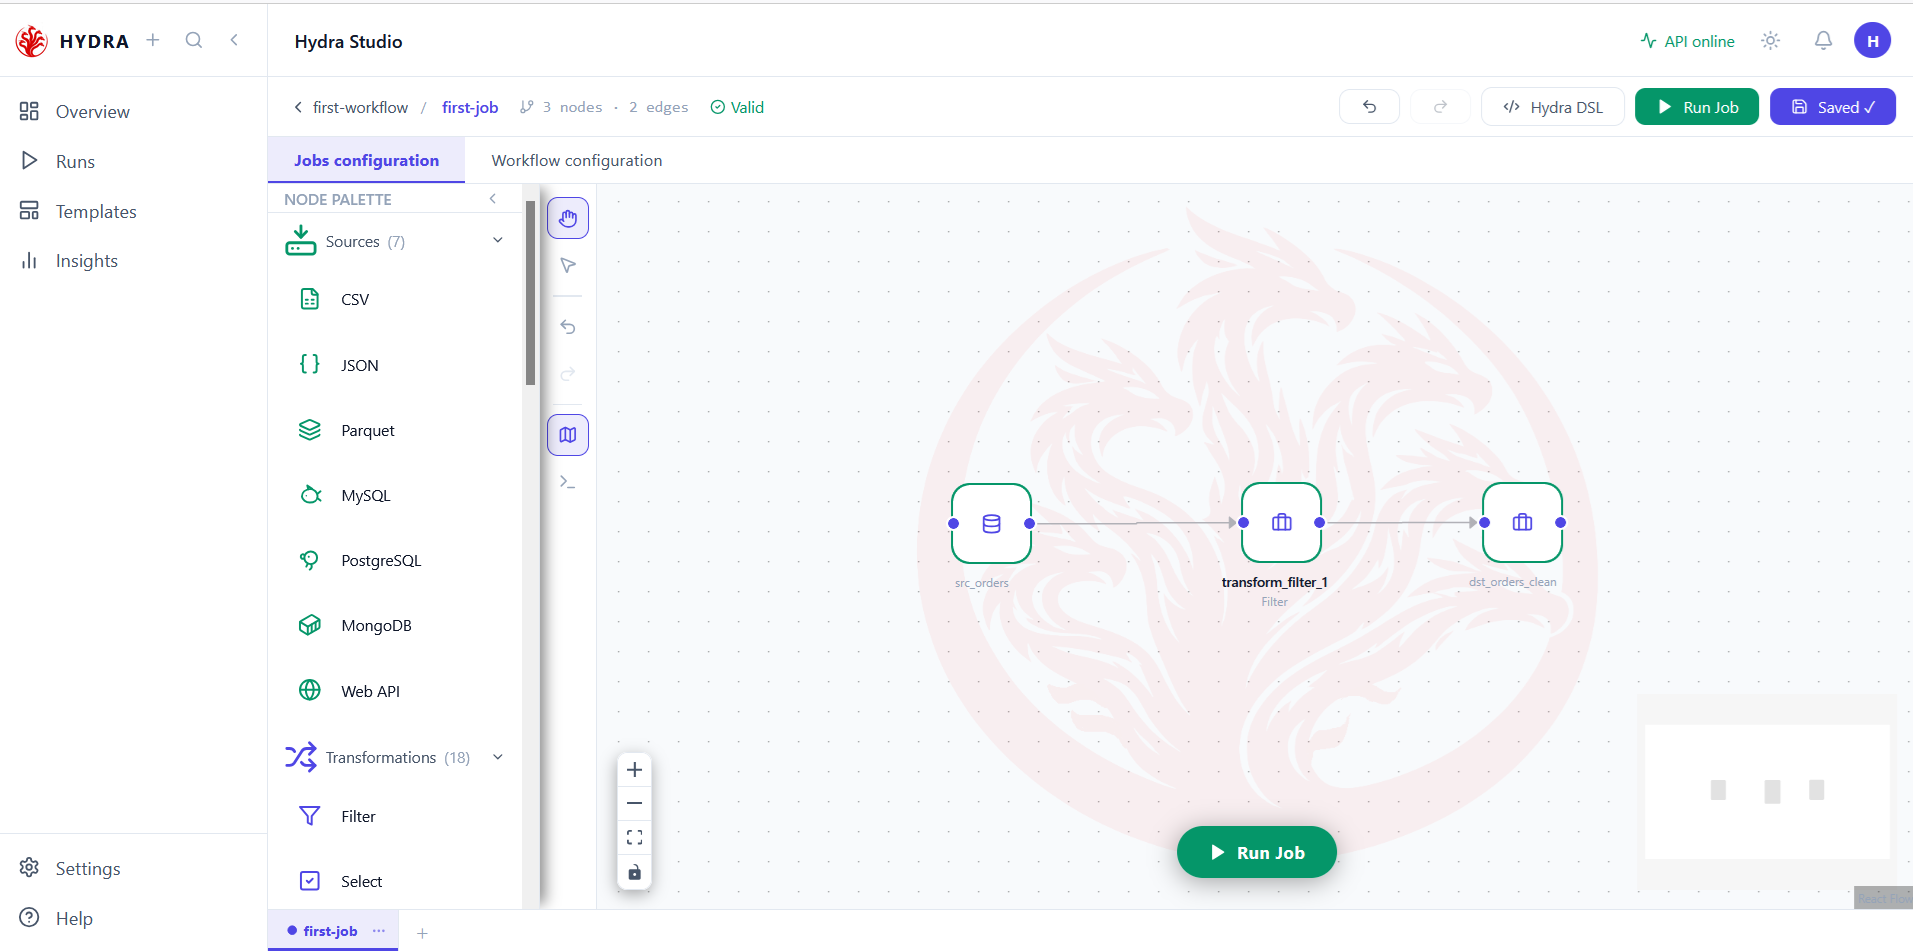
Importing brings the manifests, not your intent. Adding a filter here is what makes the run interesting: without it the job would copy its input unchanged, and the numbers at the end would tell you nothing.
Three nodes, two edges, and the header reading Valid.
first-workflow / first-job   3 nodes · 2 edges   Valid
src_orders → transform_filter_1 → dst_orders_clean
03Point the three nodes at real values
Objective
Replace what the import brought with paths and a condition that belong to your machine.
Actions
- Open the source and set the input file.
- Open the filter and write its expression.
- Open the destination and set the output file.
double-click each node → fill → Save
An imported job carries the paths of the machine it came from. They are almost never the paths of yours, so this step is not optional — and a run that reads nothing usually traces back to a path nobody checked.
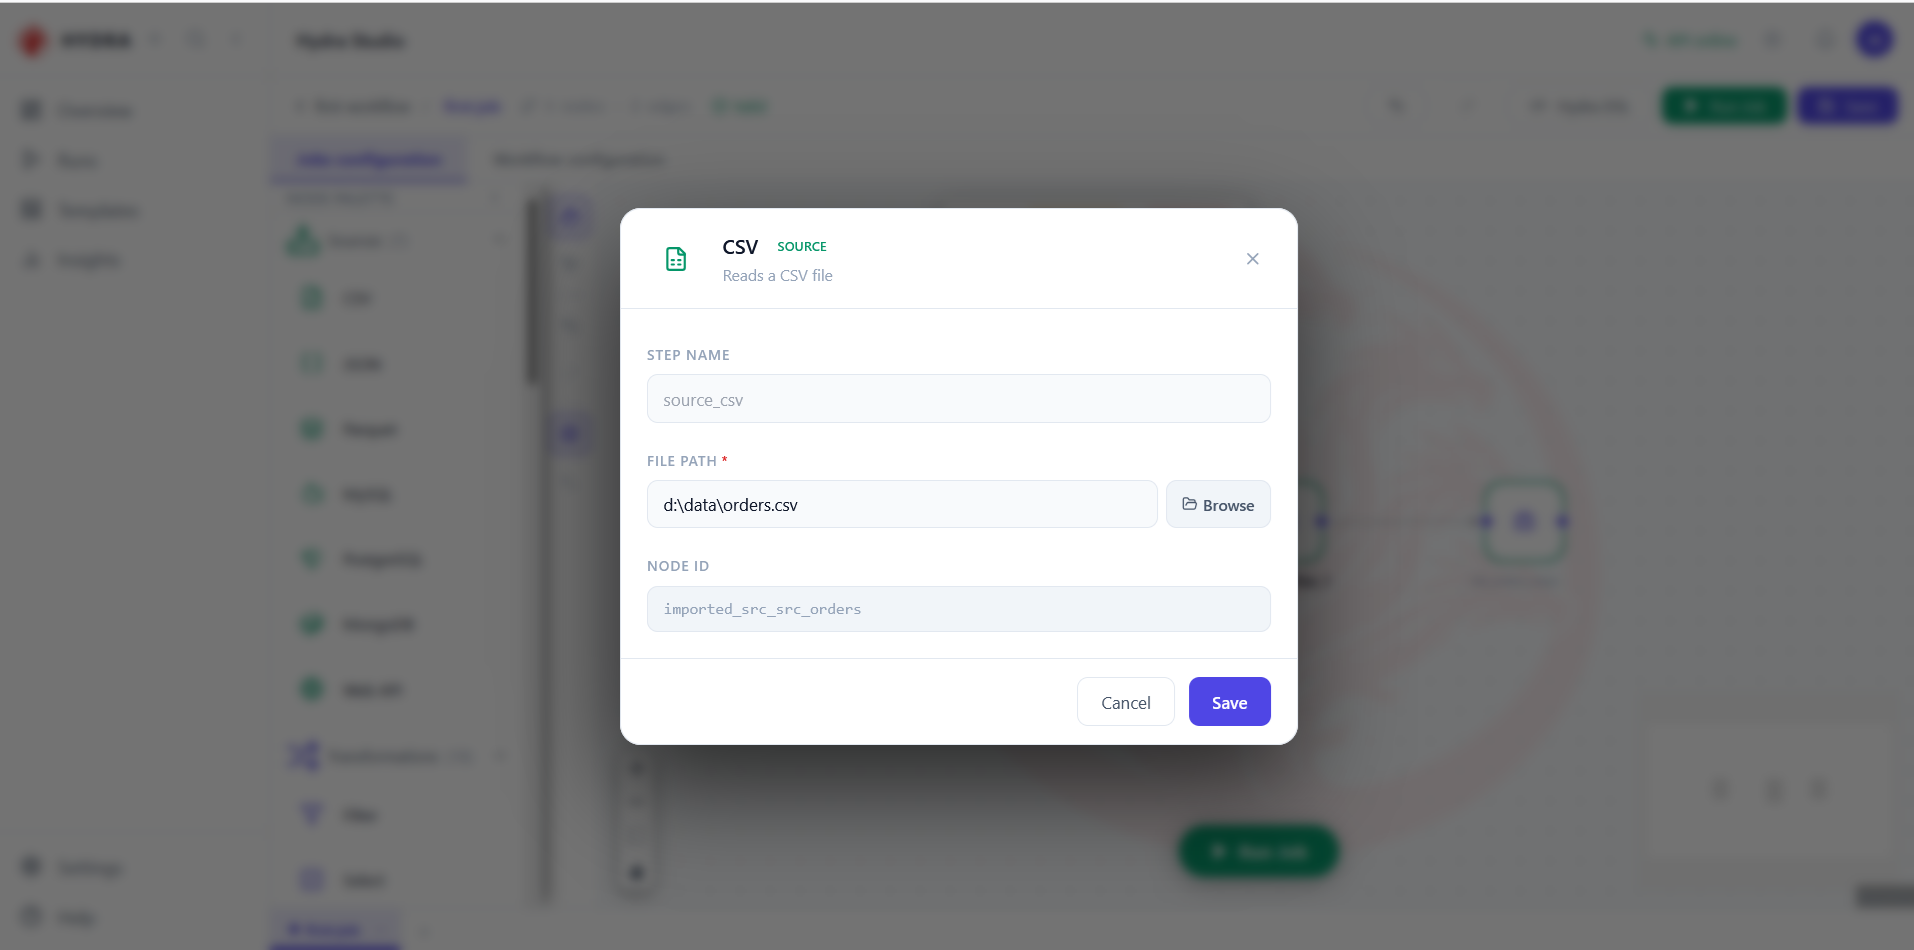
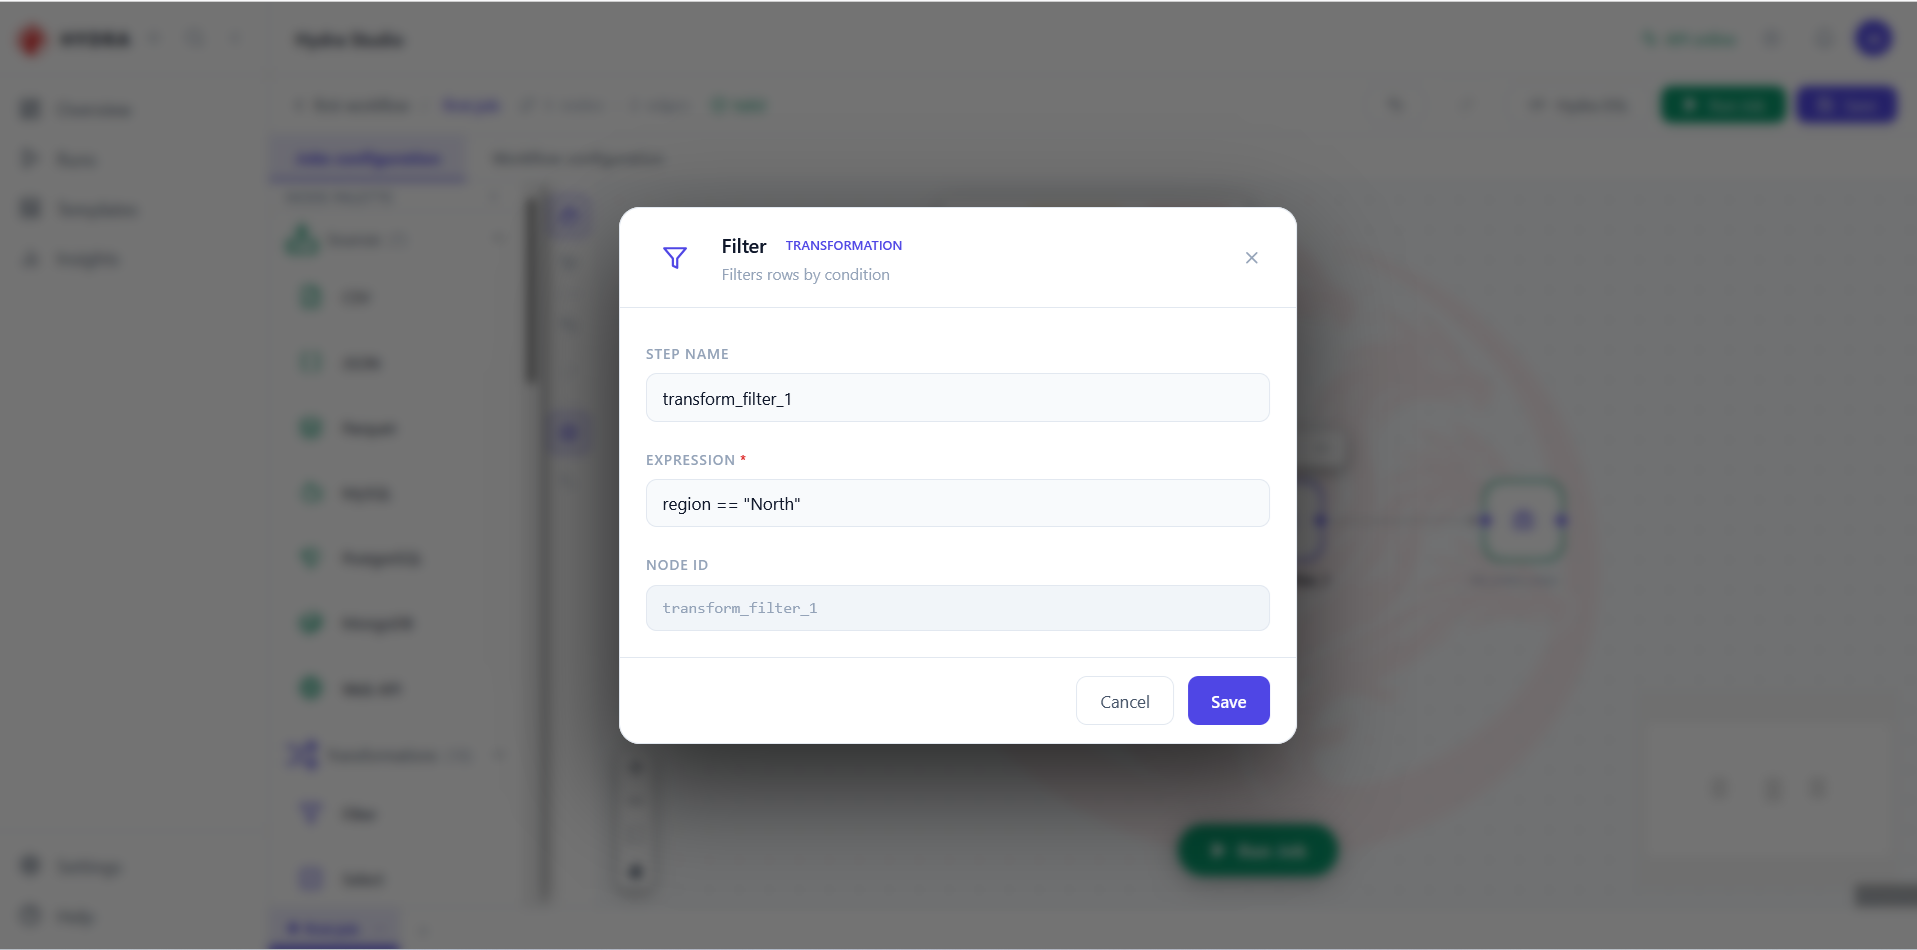
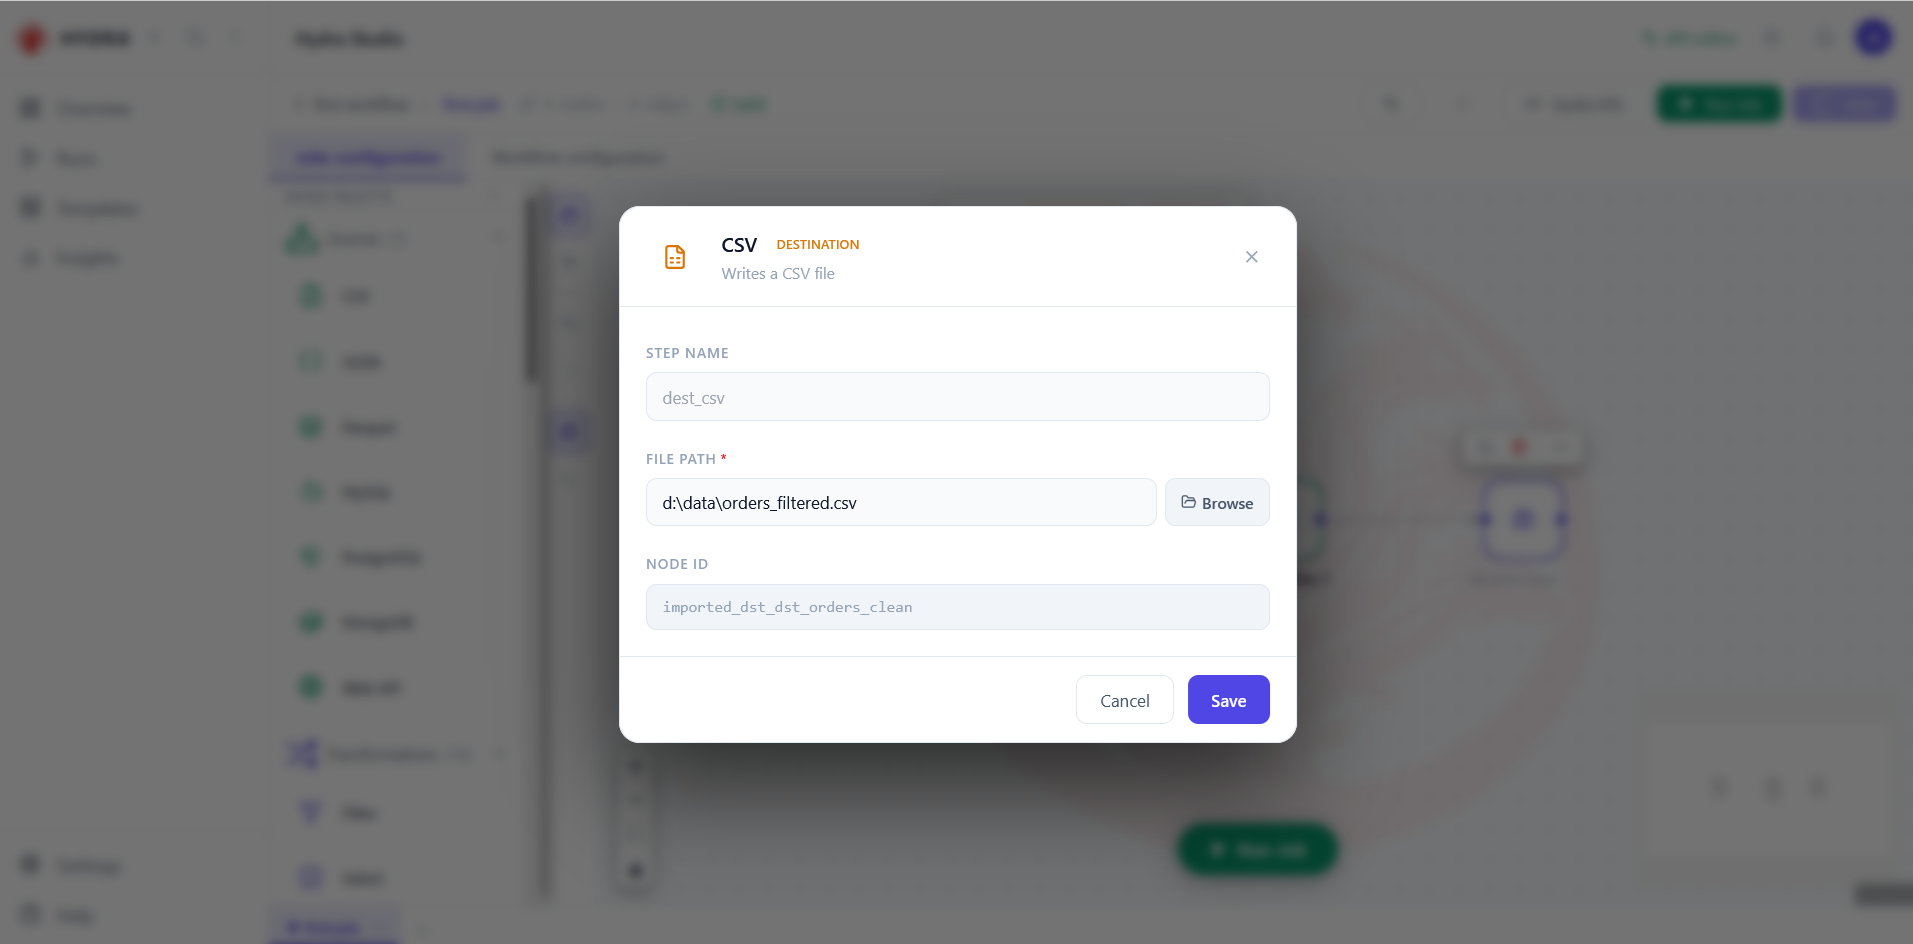
Every red badge cleared. A badge left anywhere means a required field is still empty, and the run will stop there.
FILE PATH *   d:\data\orders.csv
EXPRESSION *  region == "North"
FILE PATH *   d:\data\orders_filtered.csv
04Run the job on its own
Objective
Execute one job, without the workflow around it.
Actions
- Stay in Jobs configuration.
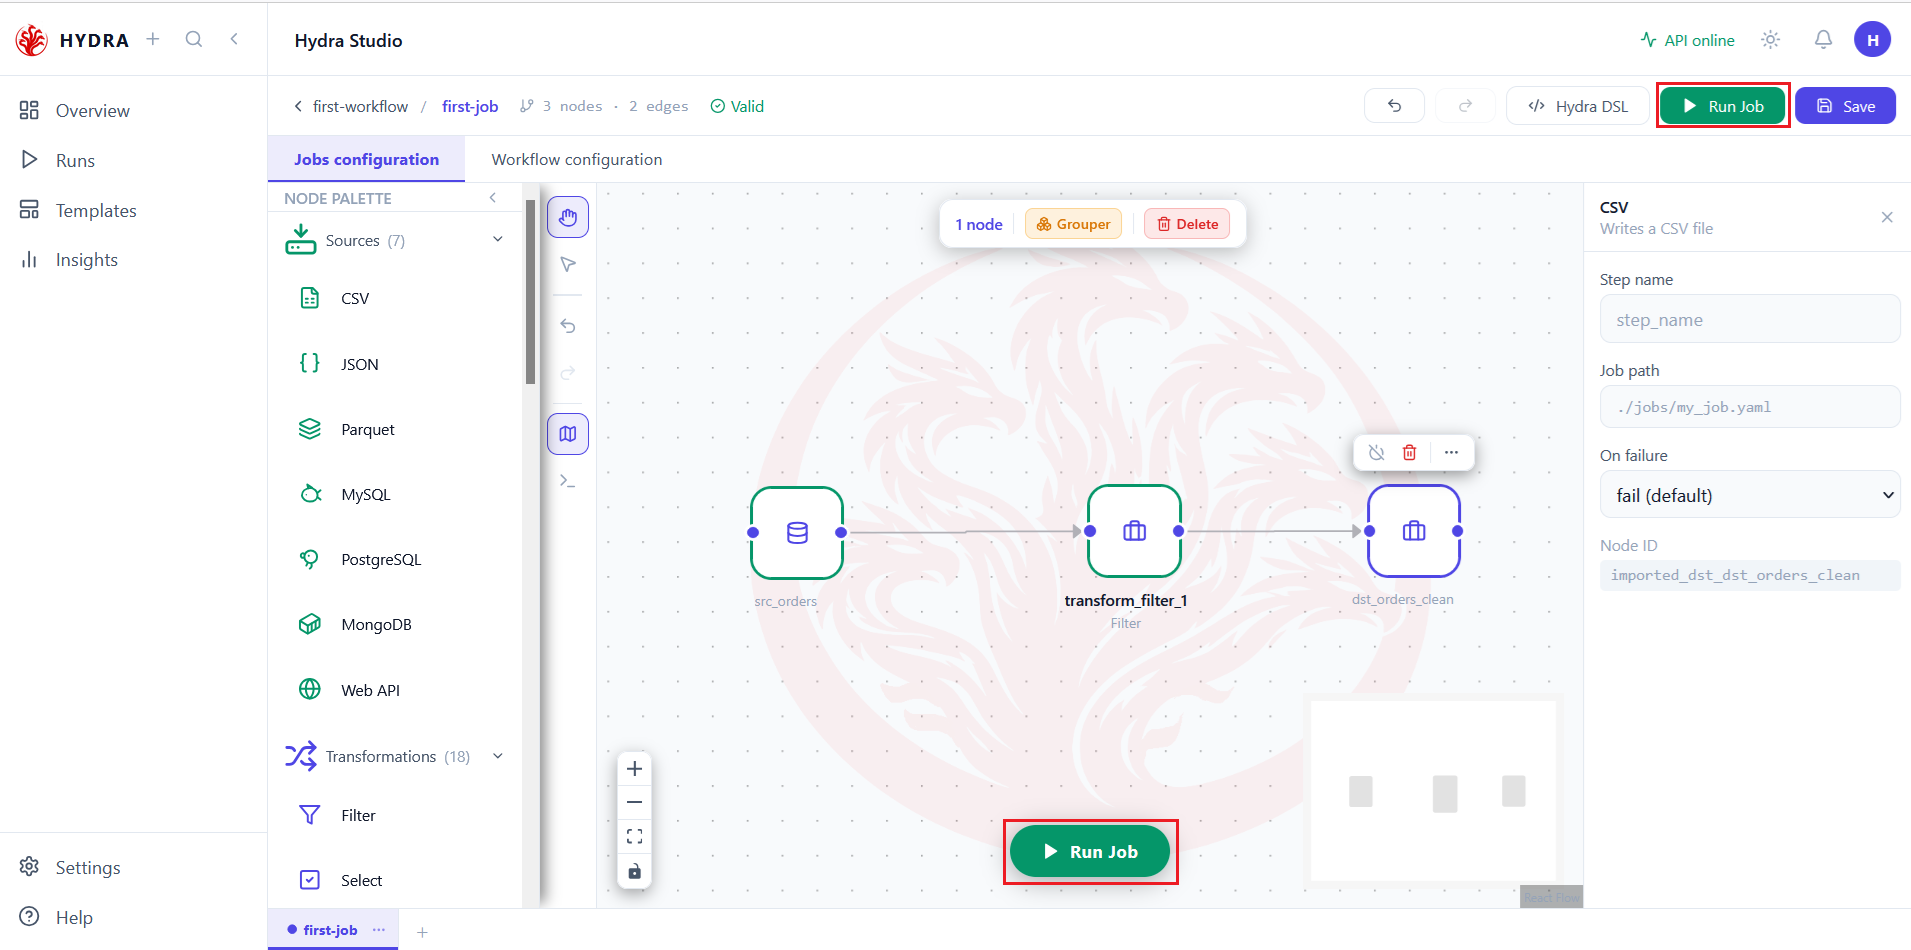
- Select Run Job — in the top bar or in the middle of the canvas.
- Wait for the panel to open at the bottom.
Jobs configuration → Run Job
Two buttons, one action. The green one in the top bar and the floating one on the canvas do the same thing; the second is simply closer to where your eyes already are. This is the loop you use while designing — one job, immediate feedback, no orchestration in the way.
The run panel opens with three tabs and a status. Logs holds the trace, Parameters the values in play, Terminal a shell.
LOGS PARAMETERS TERMINAL SUCCESS
05Read the numbers, not the colour
Objective
Take from the log the two figures that tell you whether the job did what you meant.
Actions
- Open the Logs tab.
- Find the
rows_inandrows_outline. - Compare it with what your filter should have kept.
LOGS → rows_in · rows_out
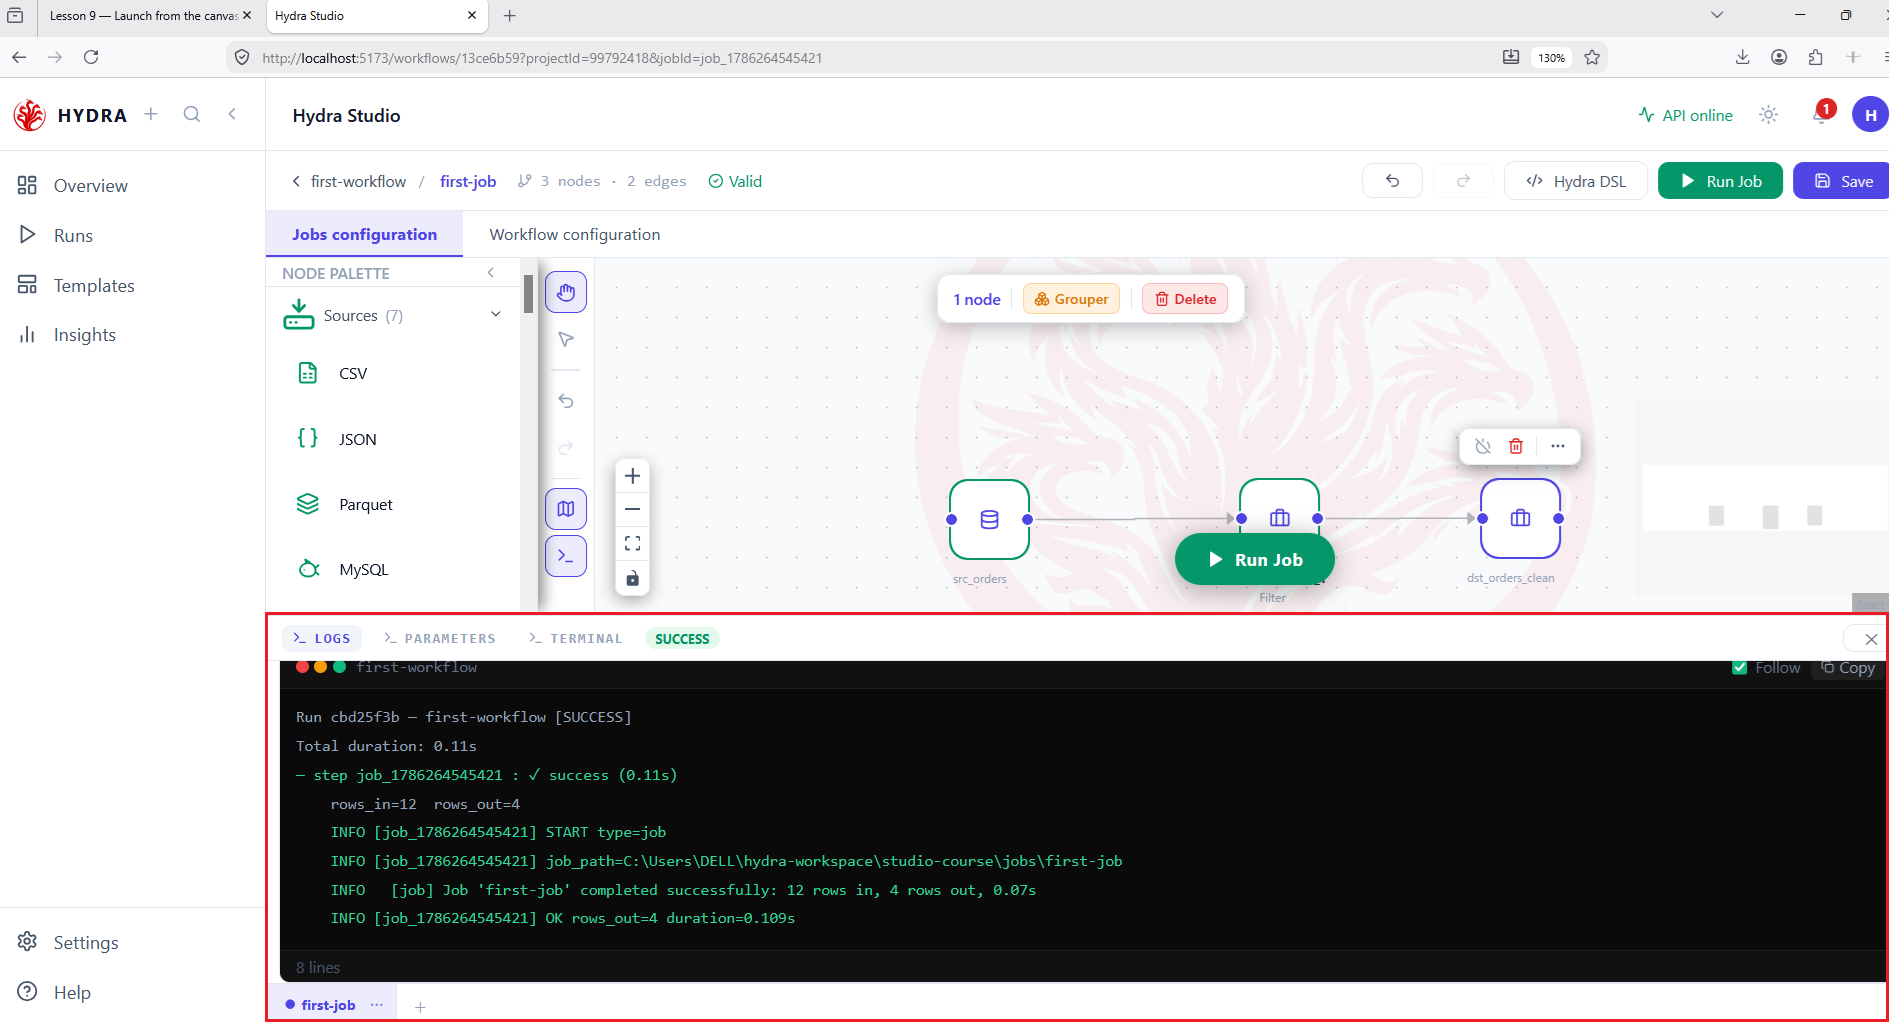
Green means the job finished, not that it was right. The pair of counters is the real verdict: twelve rows read, four written, and the difference is exactly what the filter removed. Had it written twelve, the filter would not have been applied; had it written zero, the expression matched nothing.
A short trace, ending on the row counts and the duration. The job_path line is worth reading too — it tells you which folder actually ran.
Run cbd25f3b — first-workflow [SUCCESS]
Total duration: 0.11s
- step job_1786264545421 : ✓ success (0.11s)
    rows_in=12  rows_out=4
    INFO  [job] Job 'first-job' completed successfully: 12 rows in, 4 rows out, 0.07s
06Run the parent workflow
Objective
Execute the job through the orchestration that contains it.
Actions
- Switch to Workflow configuration.
- Select Run Workflow.
- Read the summary line at the end of the log.
Workflow configuration → Run Workflow
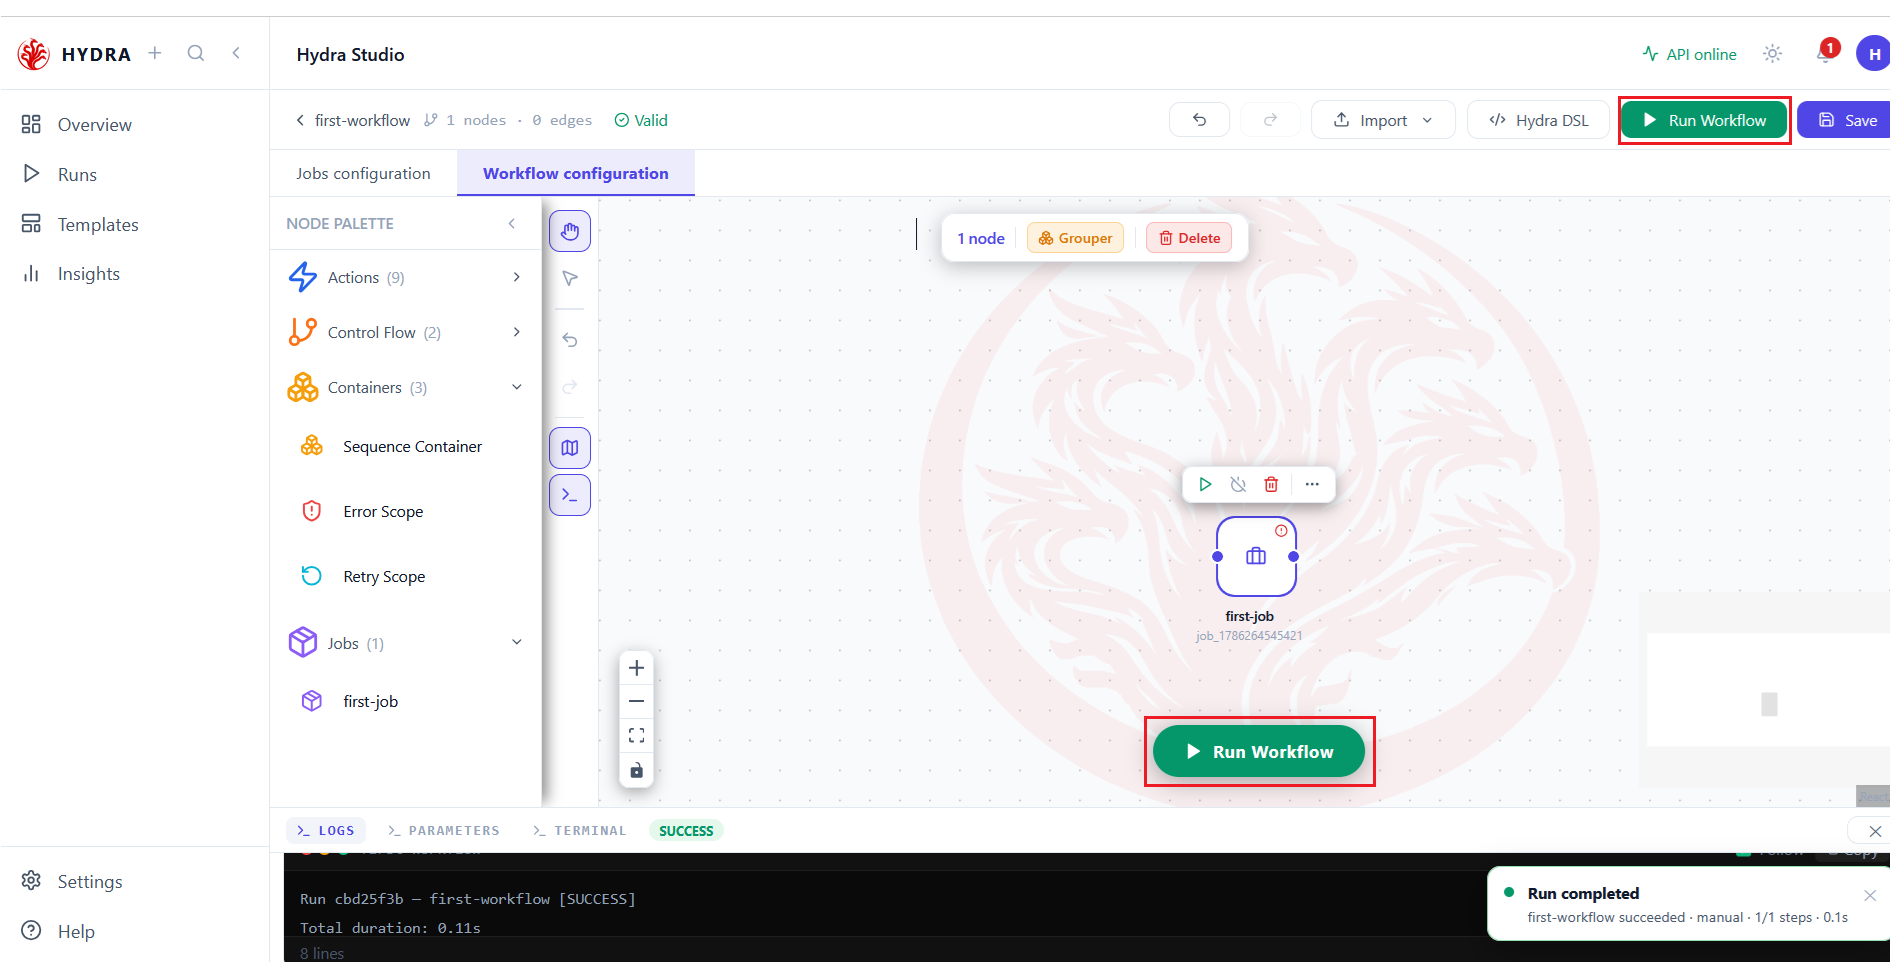
Same engine, wider scope. Run Job executes one job; Run Workflow walks the whole graph — every job, every action, in dependency order, applying the policies your containers wrote. Use the first while building, the second to check the design as a whole.
| Button | Runs | Reach for it when |
|---|---|---|
| Run Job | The open job, alone | You are iterating on one transformation. |
| Run Workflow | Every step of the graph | You want to know the whole thing holds together. |
A run identifier, the trigger, the number of steps and the duration — the workflow-level summary rather than one job's counters.
Run cbd25f3b — first-workflow [SUCCESS]
Total duration: 0.11s
first-workflow succeeded · manual · 1/1 steps · 0.1s
07Let the notifications keep the history
Objective
Find the runs you launched while looking elsewhere.
Actions
- Select the bell in the top bar.
- Read the entries, newest first.
- Use Clear all once you have read them.
Top bar → notifications
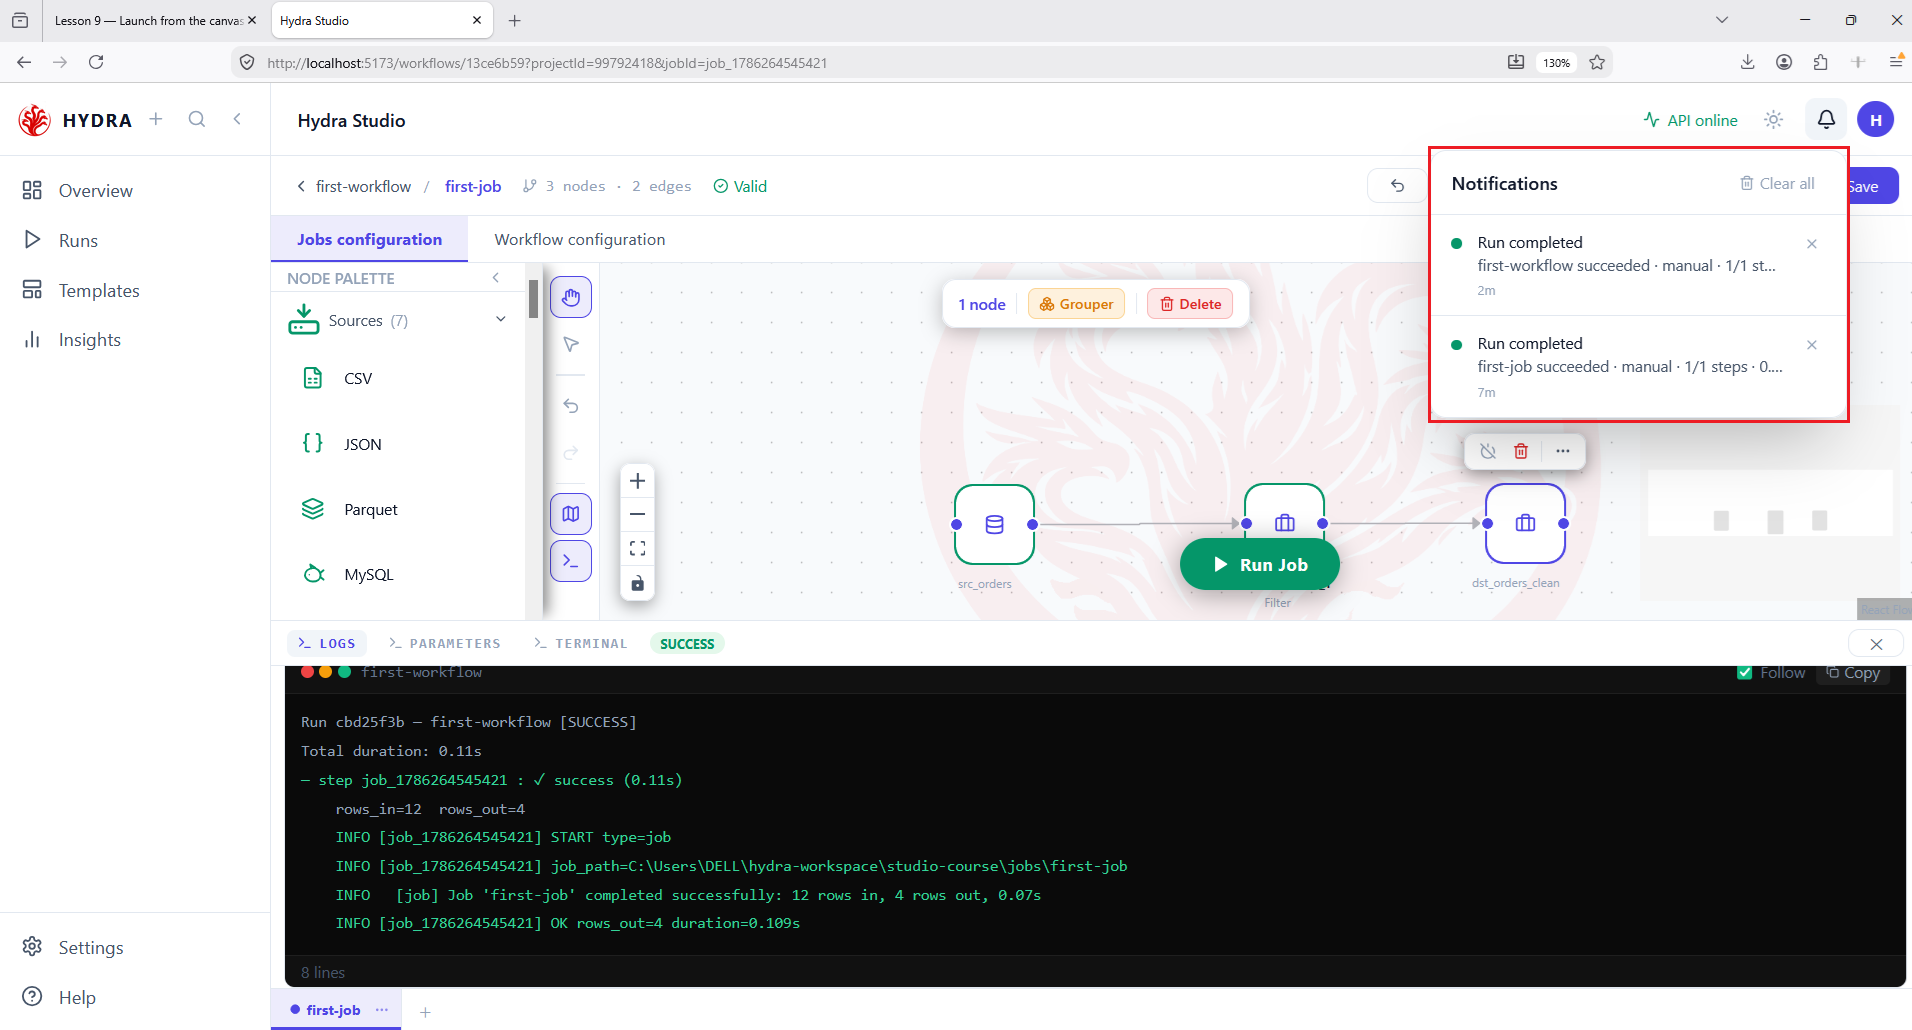
Each finished run leaves a line: what ran, how it was triggered, how many steps and how long ago. The toast in the corner disappears on its own — the bell keeps it. That matters once a run takes longer than your attention.
One entry per run, job runs and workflow runs together, each with its age.
Run completed   first-workflow succeeded · manual · 1/1 st…   2m
Run completed   first-job succeeded · manual · 1/1 steps · 0…  7m
08Run from the terminal, without leaving Studio
Objective
Reach the same job through the CLI, in the panel you already have open.
Actions
- Open the Terminal tab of the run panel.
- Type
hdrctl runfollowed by the job folder. - Read the summary the CLI prints.
hdrctl run <path-to-job-folder>
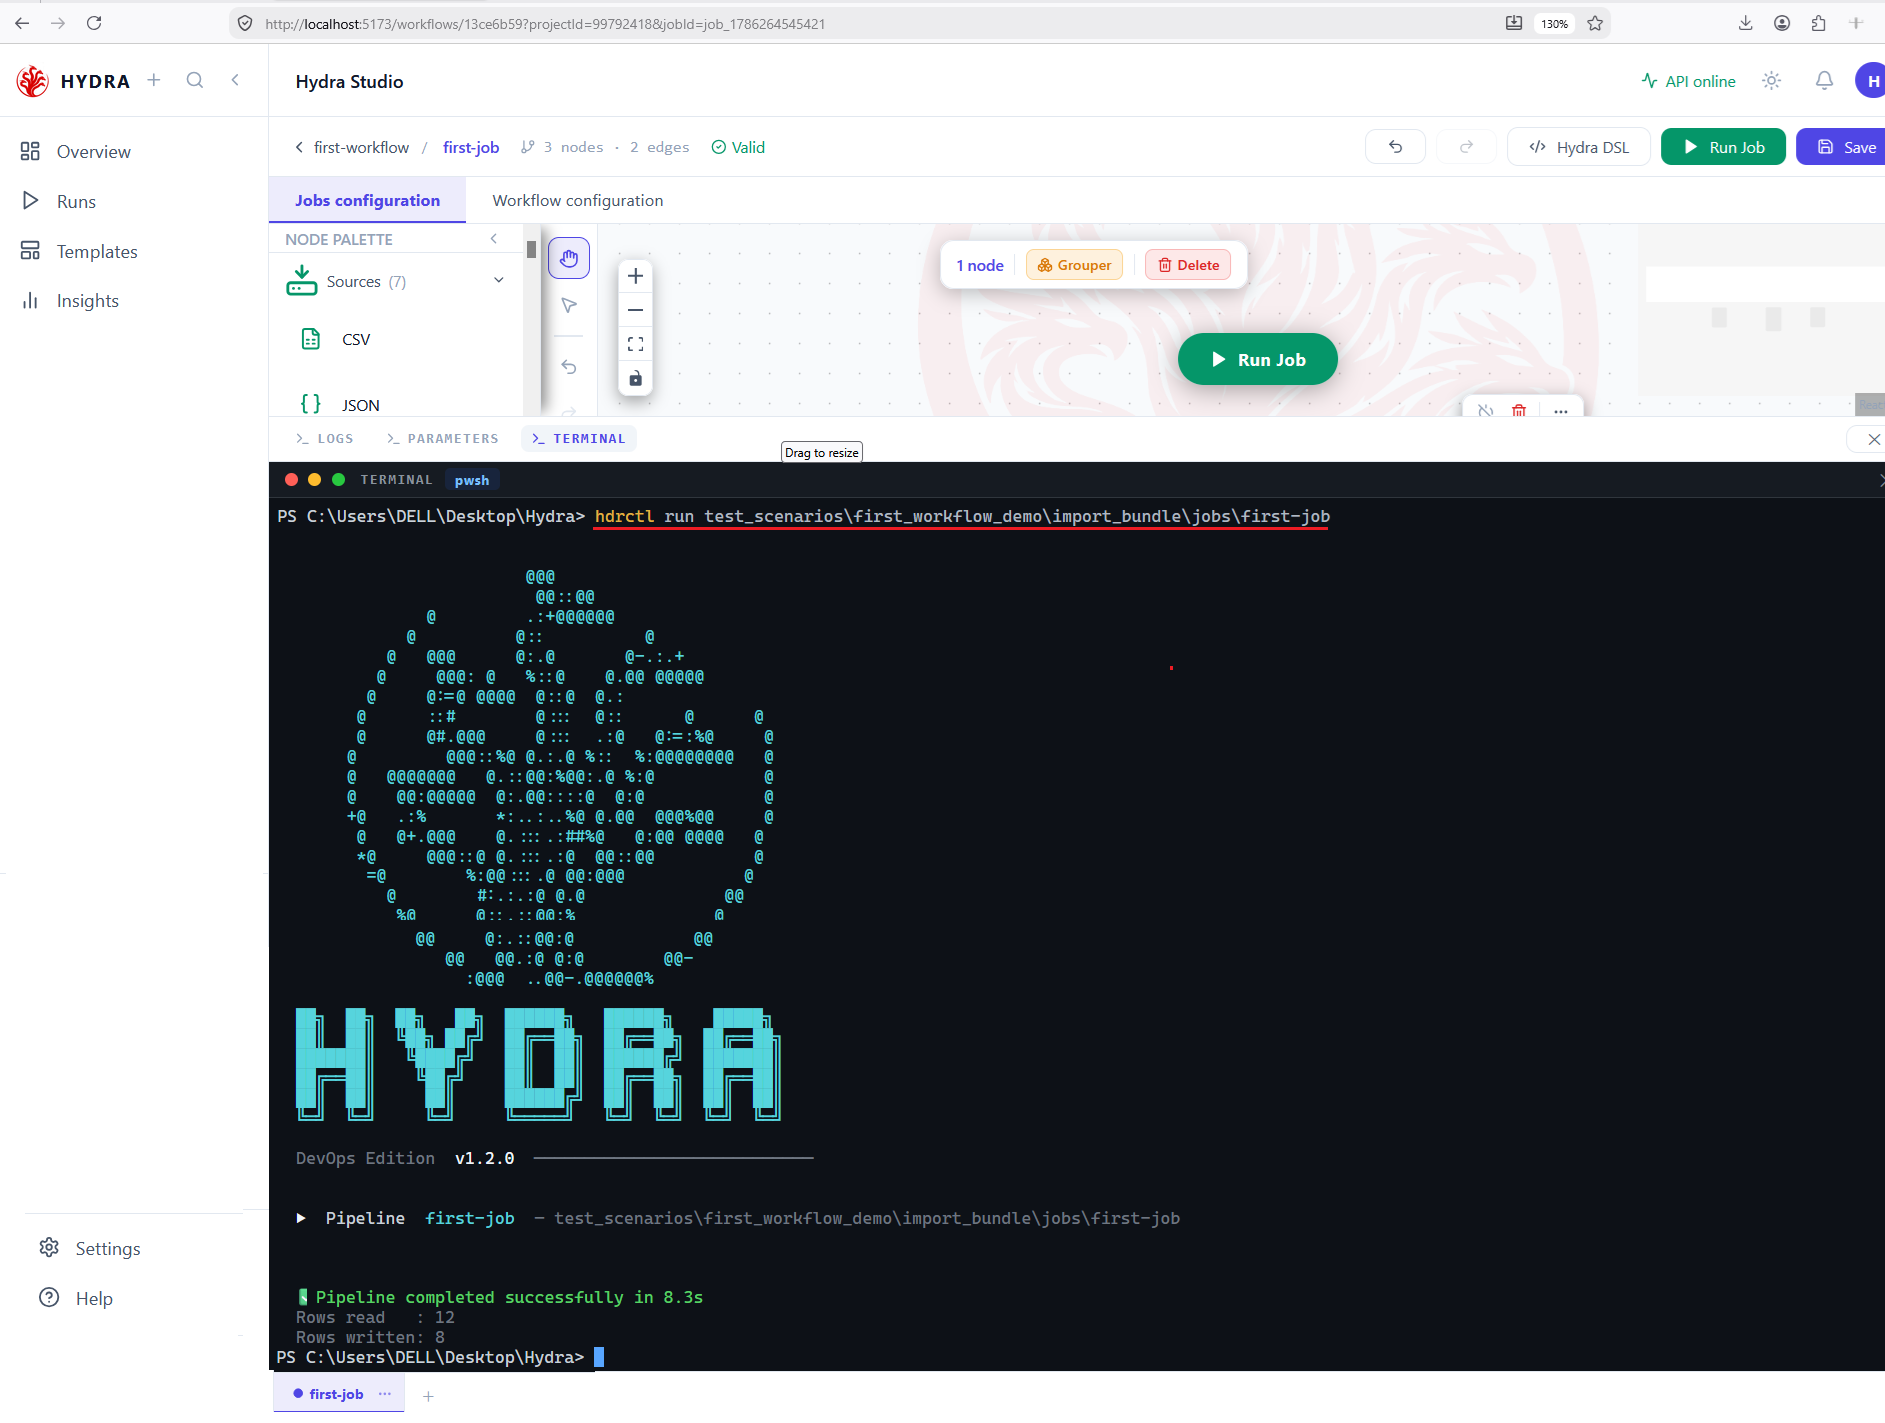
The terminal is a real shell inside Studio, so nothing is simulated. hdrctl run takes the folder of a job — the one holding the four manifests. It reports the same work in its own words: rows read, rows written, duration.
The banner, then the pipeline line, then the two counters. Same engine as the button, different presentation.
▶ Pipeline  first-job  — test_scenarios\first_workflow_demo\import_bundle\jobs\first-job

✅ Pipeline completed successfully in 8.3s
Rows read   : 12
Rows written: 8
09Run the whole workflow from the CLI
Objective
Launch the orchestration the way a scheduler would.
Actions
- Stay in the terminal.
- Run
hdrctl workflow runon the workflow file. - Read one line per step.
hdrctl workflow run "<path>\workflow.yaml"
Note the difference in what each command expects: hdrctl run takes a job folder, hdrctl workflow run takes a workflow file. Point the second at a folder and it will not find anything to run.
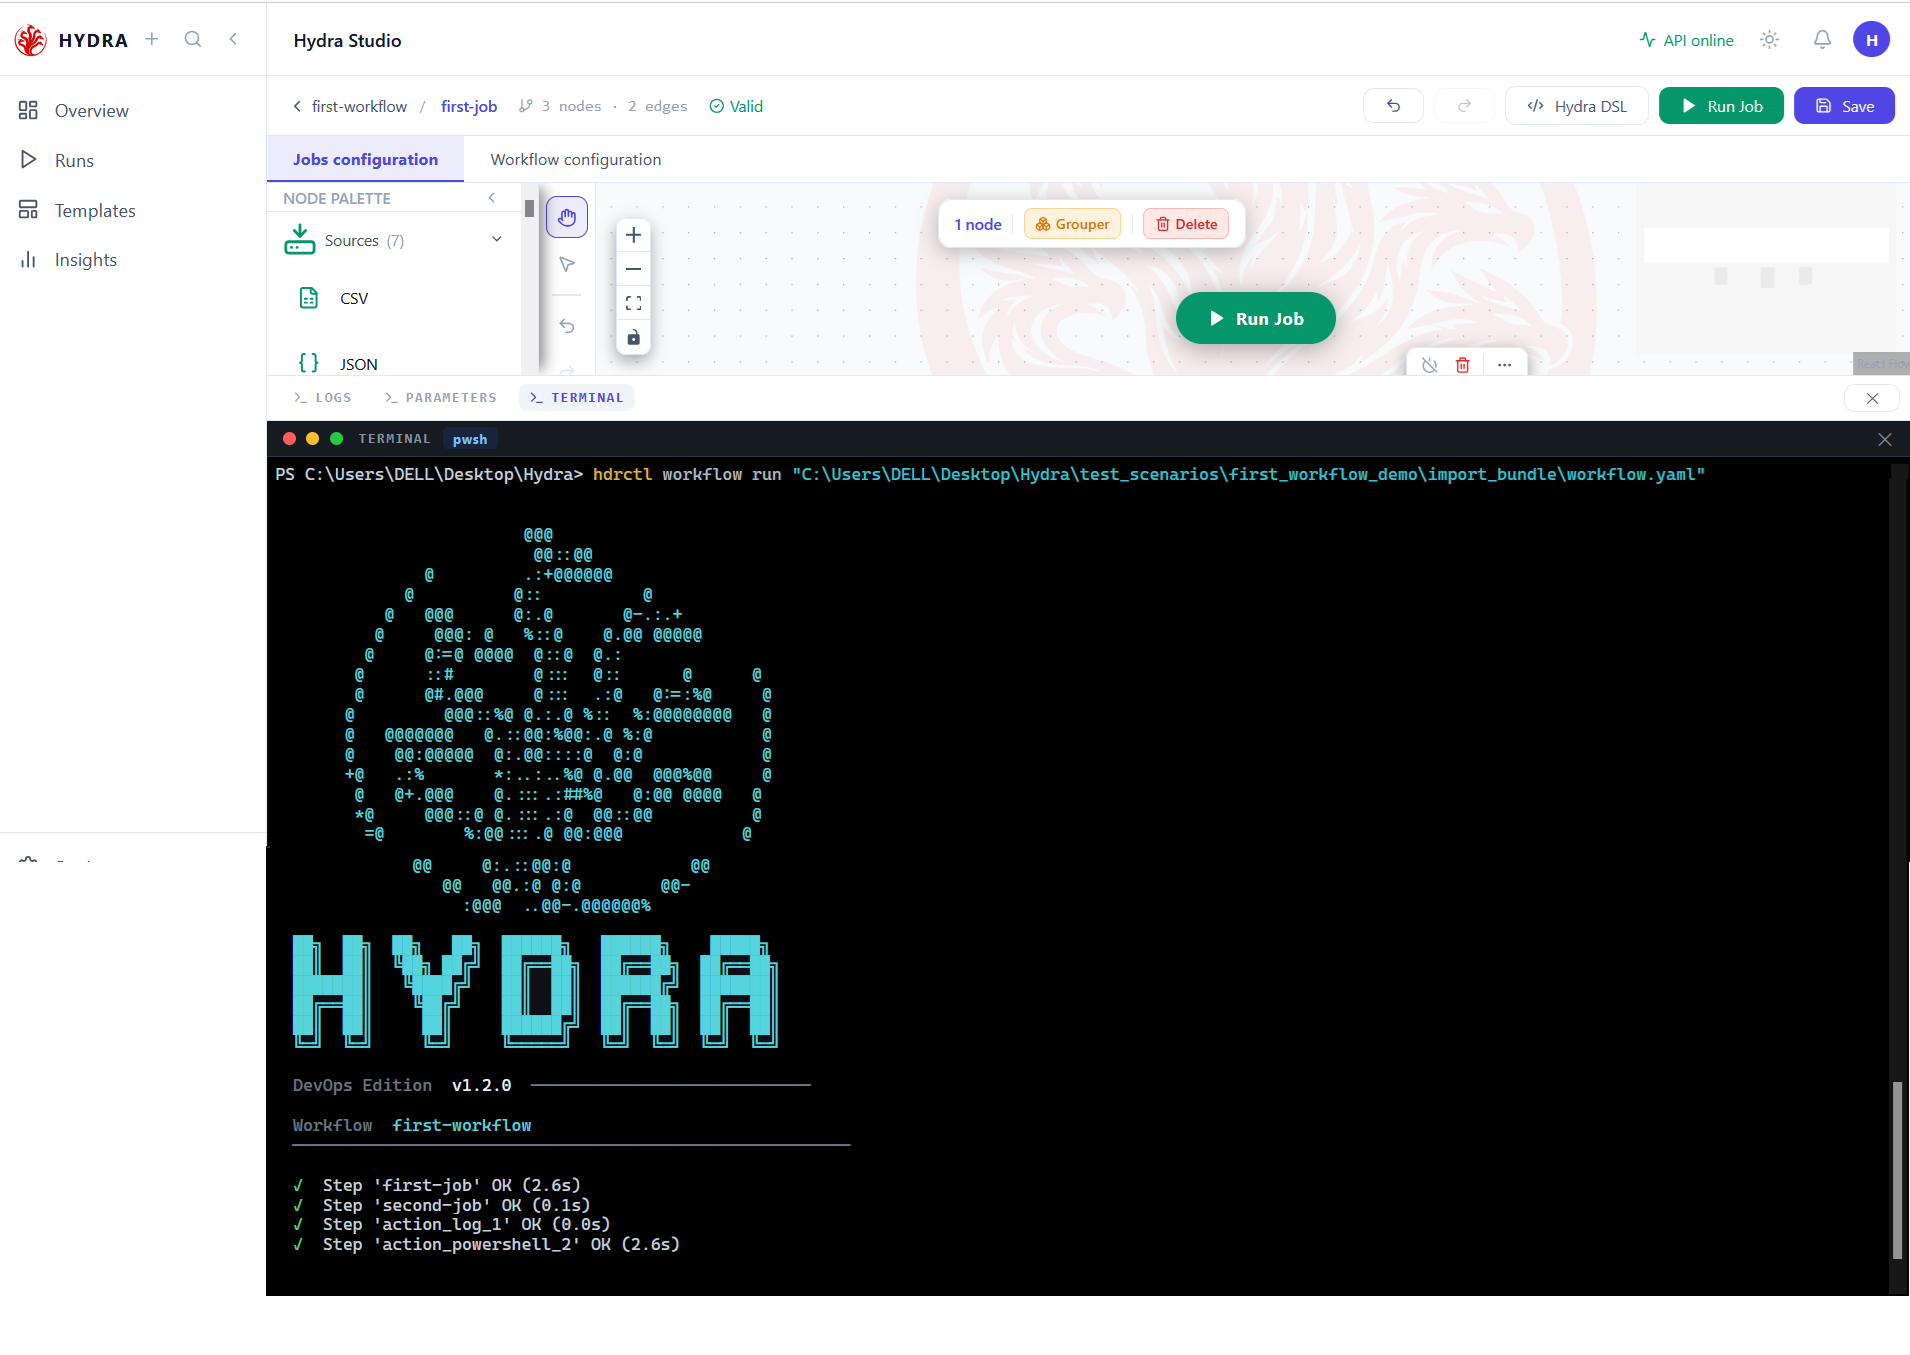
This is also the command a scheduler, a CI pipeline or a colleague without Studio will use. That the same design runs identically from a button and from a shell is the whole point of keeping the manifests plain files.
One line per step, in dependency order, each with its duration — jobs and actions alike.
Workflow  first-workflow
✓  Step 'first-job' OK (2.6s)
✓  Step 'second-job' OK (0.1s)
✓  Step 'action_log_1' OK (0.0s)
✓  Step 'action_powershell_2' OK (2.6s)
Tips and traps
The four routes share one engine. A job that runs from the canvas runs from the CLI, and the reverse.
Green means finished, not correct. Read rows_in and rows_out before believing it.
Use Run Job while iterating, Run Workflow to check the design holds together.
hdrctl run takes a job folder; hdrctl workflow run takes a workflow file. They are not interchangeable.
An imported job keeps the paths of another machine. Reopen all three nodes before the first run.
Row counts belong to one path. Read the job_path line before comparing two runs.
The toast fades, the bell keeps it. Reach for it when a run outlasts your attention.
A shell action ties the run to its host. PowerShell succeeds on Windows and fails on Linux.
3. Checklist
| Verification | Expected result |
|---|---|
| Import | The job appears as a node and in the palette |
| Configuration | No red badge on any of the three nodes |
| Run Job | The panel opens on SUCCESS |
| Counters | rows_out matches what the filter should keep |
| Run Workflow | A summary line with the step count |
| Notifications | One entry per completed run |
| CLI | The same work, reported as rows read and written |
4. Troubleshooting
| Symptom | Cause | Fix |
|---|---|---|
| Run Job does nothing | A node still carries a red badge | Open each node and fill the fields marked with a red asterisk |
rows_in=0 | The source path does not point at your file | Reopen the source and use Browse |
rows_out=0 | The filter expression matches nothing | Check the column name and the exact spelling of the value |
rows_out equals rows_in | The transformation is not on the chain | Reconnect it between the source and the destination |
| The CLI reports no workflow file | A folder was passed instead of the file | Append \workflow.yaml to the path |
| Two runs report different counts | They ran different job folders | Compare the job_path line of each |
5. Next lesson
The job runs, and you can read its verdict. The next lesson opens the Runs page, where those verdicts are kept — and where a failure explains itself.